
If you’ve ever peeked under your cat’s ear flap and thought “wait, is that supposed to be there?” — you’re not alone. Most cats don’t need their ears cleaned often, but when they do, doing it wrong (wrong tools, wrong technique, or cleaning too much) can cause more harm than the dirt ever would. Here’s how to actually do it, how to tell if it’s even necessary, and when cleaning isn’t the answer at all.
Quick answer: Use a veterinarian-recommended cat ear cleaner, gently massage the base of the ear, let your cat shake, then wipe away loosened debris with cotton or gauze. Never push cotton swabs into the ear canal. If the ear is red, painful, smelly, swollen, or producing unusual discharge, contact your veterinarian instead of cleaning it.
Does Your Cat Actually Need Its Ears Cleaned?
This is the part most guides skip, and it matters more than the technique itself: most healthy cats don’t need frequent ear cleaning. Cleaning unnecessarily or too often may irritate the ear canal, so it’s better to check your cat’s ears regularly and clean them only when needed — or when your veterinarian recommends it.
So the real first step isn’t cleaning. It’s checking.
What a Healthy Cat Ear Looks Like vs. One That Needs Cleaning
Gently lift the ear flap (the pinna) and look at the visible part of the canal in good light. Here’s the quick comparison:
| What to check | Probably healthy | May need cleaning | Call your vet |
| Color | Pale pink | Normal color, visible wax | Red or inflamed |
| Debris | Little to none | Small amount of ordinary wax | Heavy, dark, or unusual discharge |
| Odor | Little to none | No unusual odor | Strong or foul odor |
| Behavior | Normal | Normal | Scratching, head shaking, pain, or head tilt |
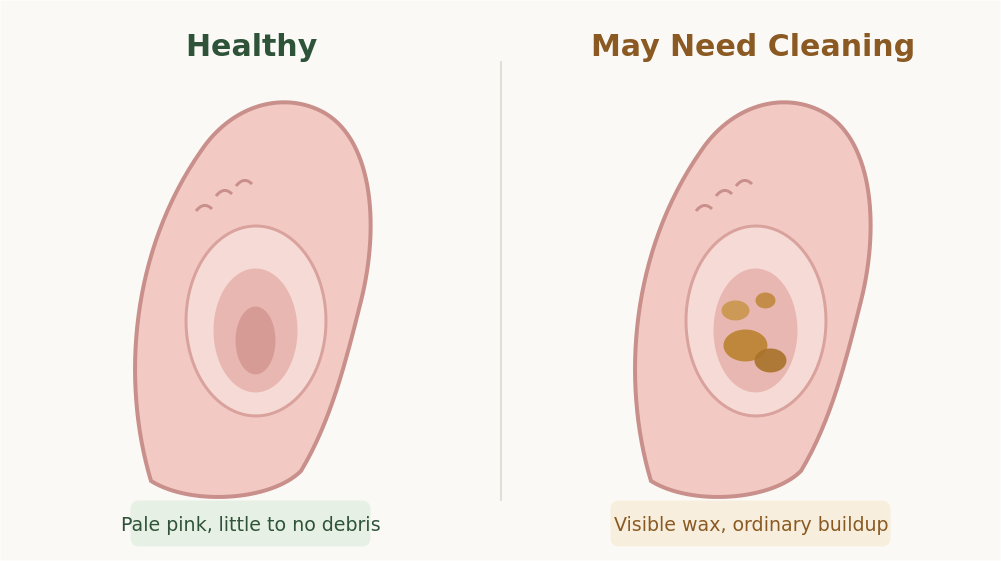
If your cat’s ears land in that third column, skip the cleaning and call your veterinarian first. Redness, unusual discharge, odor, pain, or persistent scratching can indicate an underlying ear problem that needs to be diagnosed before you try to treat it at home.
How Often Should You Clean Your Cat’s Ears?
There’s no universal ear-cleaning schedule that works for every cat. Check your cat’s ears regularly — weekly can be a convenient routine for some owners — but clean only when needed or as recommended by your veterinarian.
Most indoor cats go a long time between actual cleanings; a regular look is about catching problems early, not scrubbing on a schedule. Some cats may need more frequent ear care because of individual wax production or an underlying ear or skin condition — your veterinarian can recommend an appropriate schedule if buildup keeps returning. Cleaning a healthy ear too frequently can irritate the skin, which is a point vets make consistently when explaining why “more often” isn’t automatically better (Inheart Animal Hospital). VCA Hospitals’ clinical instructions likewise frame cleaning as something done in response to visible debris, not on a fixed calendar (VCA Hospitals).
If you’re not sure whether your specific cat needs a routine, that’s a genuinely good question for your vet at the next checkup — it varies enough by cat that a blanket rule isn’t responsible advice.
What to Clean Your Cat’s Ears With
Keep the supply list short and simple:
- A veterinary ear-cleaning solution made specifically for cats (ask your vet for a brand recommendation — formulations vary by pH and ingredients)
- Cotton balls, cotton pads, or gauze squares
- A towel, for wrapping a wiggly cat or mopping up drips
- Treats, for bribery and morale

What NOT to Use
This is where a lot of well-meaning owners get it wrong:
- No cotton swabs (Q-tips). Don’t insert them into your cat’s ear canal. They can push wax and debris deeper and may injure delicate structures inside the ear (Hill’s Pet).
- No alcohol, vinegar, or hydrogen peroxide. These are common “home remedy” suggestions online, but they’re astringent enough to sting broken or irritated skin and can actually worsen inflammation rather than disinfect it safely.
Stick with a product labeled for cats, or one recommended by your veterinarian.
How to Clean Cat Ears at Home: Step-by-Step
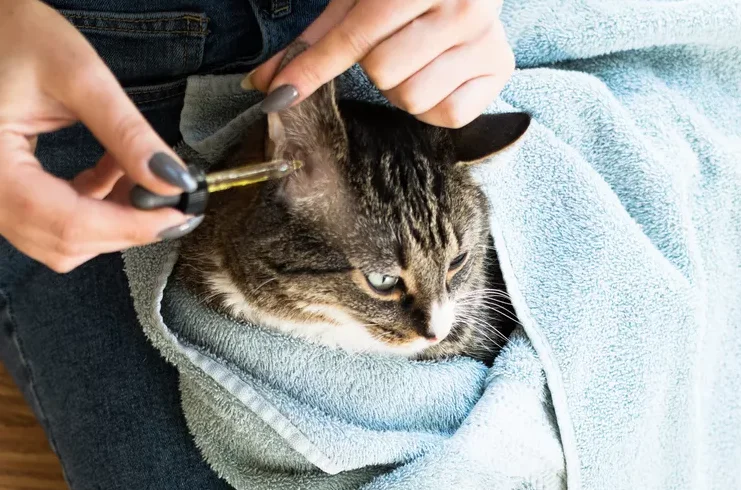
- Pick a calm moment. Not right after a play session, not when your cat’s already annoyed about something else. A cat who’s relaxed in your lap is a cat who’s easier to work with.
- Do a quick check first. Lift the flap, look, and give it a sniff. If it looks or smells like the “needs a vet” column above, stop here and call your vet instead of cleaning.
- Steady your cat. Hold them gently in your lap, facing away from you if that’s calmer for them. A helper — human or a towel wrap for a wriggly cat — makes this much easier solo.
- Apply the solution. Fold the ear flap back with one hand. With the other, hold the cleaner bottle close to the ear opening without letting the tip touch the ear itself — touching it against the ear risks transferring bacteria into the bottle for next time.
- Massage the base of the ear for about 20–30 seconds. You’ll likely hear a soft squishing sound — that’s normal, and it means the solution is loosening debris inside the canal.
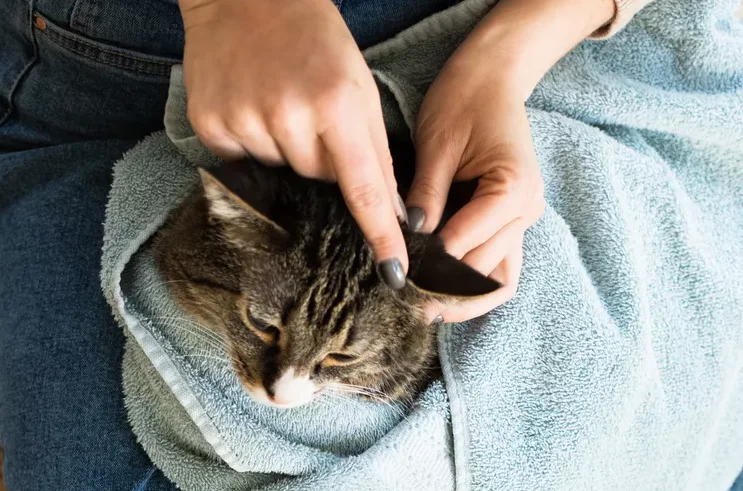
- Let your cat shake it out. This is the ear’s own way of moving loosened debris toward the opening where you can actually reach it. Keep a towel handy.
- Wipe away the debris from the visible part of the ear and the inner flap using a cotton ball or gauze — never anything narrower than your fingertip can reach.
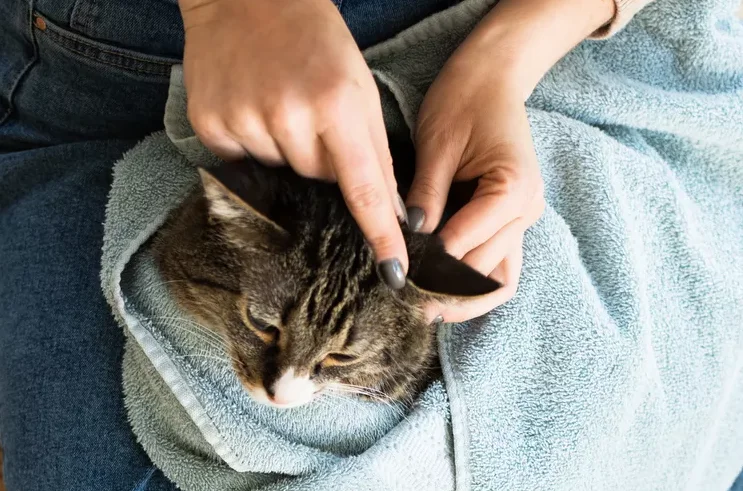
- Repeat on the other ear, and reward with treats and praise throughout, not just at the end.
If your cat tolerates one ear but shuts down for the second, it’s fine to stop and finish later. Forcing it tends to make the next attempt harder, not easier.
Cleaning a Kitten’s Ears: What’s Different
The steps above apply to kittens too, but a few things are worth knowing specifically:
- Ear mites are particularly worth watching for in kittens and cats that have had close contact with other cats — they’re highly contagious and especially common in young cats (CAPC).
- Kittens are small and can be harder to handle safely, so be especially gentle and follow the cleaner’s label directions or your veterinarian’s instructions for how much to use.
- Introduce it early and slowly. A kitten who gets used to having their ears handled calmly (even without cleaning solution at first — just a gentle look and a treat) tends to grow into an adult who tolerates real cleanings far better.
Dark, gritty, coffee-ground-like debris can occur with ear mites, especially when it’s accompanied by scratching or head shaking — but appearance alone can’t confirm the cause. If you see it, have a veterinarian examine the ears before you clean, rather than assuming it’s ordinary wax.
When Dirty Ears Are Actually Ear Mites
Ear mites (Otodectes cynotis) are an important cause of ear problems in cats, especially in younger cats, and they look like a cleaning problem even though they aren’t one you solve with a bottle of solution. The Companion Animal Parasite Council notes that one published source attributed 85% of feline otitis externa cases to these mites, though reported prevalence of the mite itself varies widely between cat populations (CAPC).
Common signs, per VCA Hospitals, include intense scratching at the ears, head shaking, and dark, waxy or crusty discharge — often described as looking like coffee grounds (VCA Hospitals). Mites aren’t something you can effectively flush out with a standard ear cleaner; they require a vet-diagnosed, targeted treatment. Cleaning alone won’t eliminate an ear-mite infestation, because the underlying parasite still needs appropriate treatment.
When to Call the Vet Instead of Cleaning
Skip the cotton balls and book an appointment if you notice:
- Thick, dark, or foul-smelling discharge
- Redness, swelling, or visible pain when the ear is touched
- Persistent head shaking, tilting, or scratching
- Ears that seem to need cleaning every few days, no matter how often you do it (a sign something underlying isn’t resolving on its own)
Any of these point to something a bottle of solution won’t fix — infection, mites, allergies, or a foreign object all need a proper diagnosis first.
FAQ
How can I clean my cat’s ears at home safely?
Use a vet-approved cat ear-cleaning solution and a cotton ball or gauze — never a cotton swab. Apply the solution near (not into) the canal, massage the base of the ear, let your cat shake, then wipe away what comes loose.
What can I clean my cat’s ears with if I don’t have a special solution?
Don’t improvise with alcohol, vinegar, hydrogen peroxide, human ear products, or other home remedies unless your veterinarian specifically recommends them — some of these can irritate an already inflamed ear canal. Use a feline ear cleaner recommended by your veterinarian instead.
How often should you clean your cat’s ears?
There’s no fixed schedule that fits every cat. Check regularly — weekly is a convenient routine for some owners — but only clean when you see visible wax or debris, or when your vet recommends it. Cleaning a healthy ear too often can irritate it rather than prevent problems.
Do all cats need their ears cleaned?
No. Many indoor cats rarely need it. Some cats need more frequent ear care because of individual wax production or an underlying ear or skin condition — your veterinarian can advise on a schedule if buildup keeps coming back.
This guide is for general informational purposes and isn’t a substitute for veterinary care. If your cat shows signs of pain, infection, or ear mites, please consult a veterinarian rather than relying on home cleaning alone.

Dr. Johnson Coleman is a dedicated veterinary expert with over 10 years of hands-on experience in animal health and wellness. His mission is to help pets live longer, happier lives through compassionate care, practical guidance, and a genuine love for animals.
After earning his Doctor of Veterinary Medicine (DVM) degree, Dr. Coleman spent a decade working in both private clinics and community shelters, where he gained deep expertise in preventive medicine, pet nutrition, and behavioral care.
He believes that pet owners deserve reliable, easy-to-understand information about their companions’ health. Through his writing, Dr. Coleman breaks down complex veterinary topics into friendly, actionable advice that helps readers make informed decisions for their pets.
Outside of his professional work, Dr. Coleman volunteers with local animal rescue groups and enjoys spending time outdoors with his two golden retrievers. His lifelong dedication to animal welfare continues to inspire his work and connect with pet lovers around the world.


